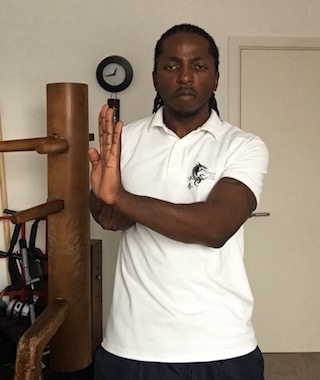
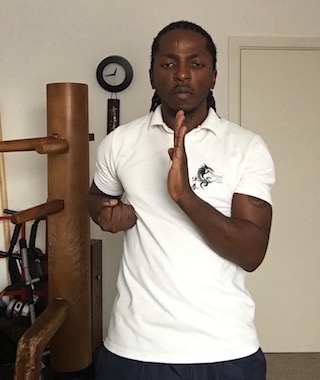
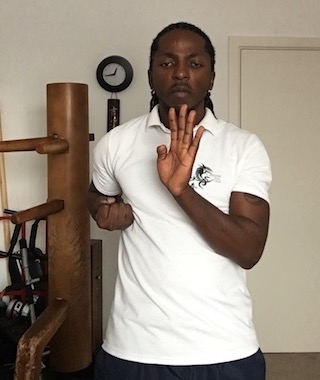
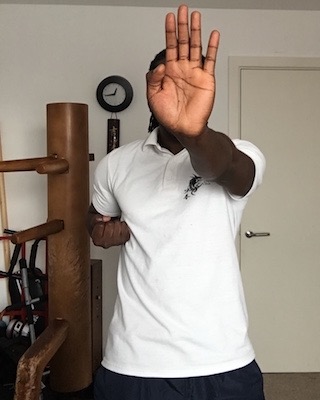
Siu Nim Tau - Little idea form
- By Sifu Neil Parris
- Oct 17, 2016
- 10 min read
Updated: Feb 5, 2024
Although all are welcome to read this article, it is intended to assist our existing students who are already studying this Form. Be aware that the Form cannot be learnt from an article, DVD etc. To learn the Form, you need an instructor to guide you through the fine points, many of which cannot be seen.
First section
Opening your stance
Yee Gee Kim Yeung Ma - Character two abduction stance
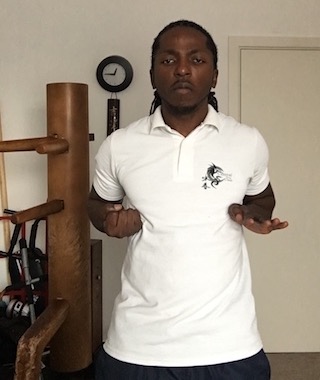
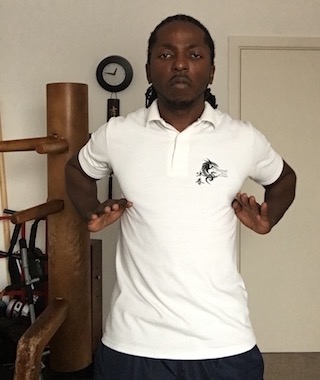
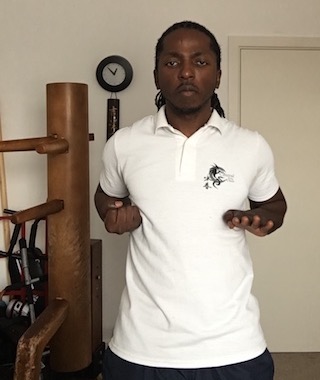
1. Begin with both feet parallel and in contact. Image 1
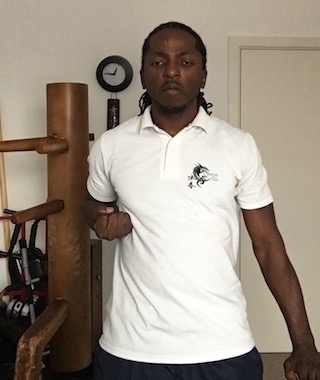
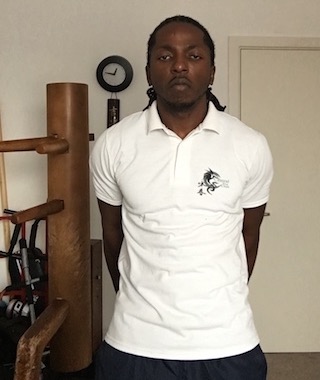
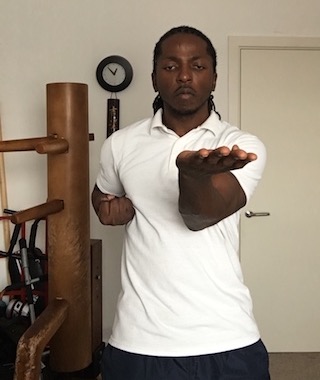
2. Bend your legs so your knees are in line with the tips of your toes. Image 2
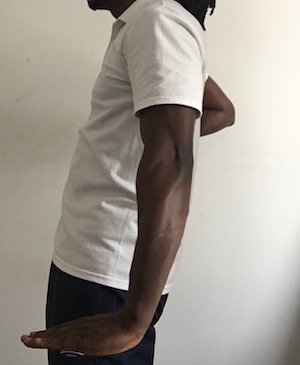
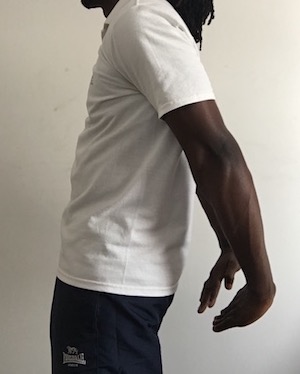
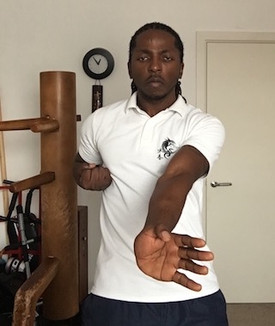
3. Pivot on your heels as you move your toes out to an angle. Your left foot should be at 10 o'clock and your right at 2 o'clock. Image 3
Defining your parameters
Jung Sin - Centre line
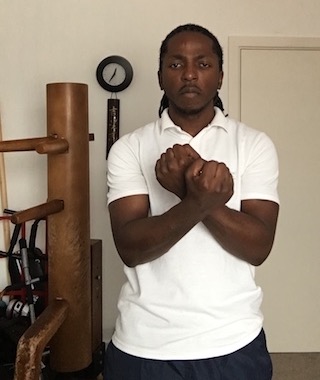
1. Neutral position. Image 1

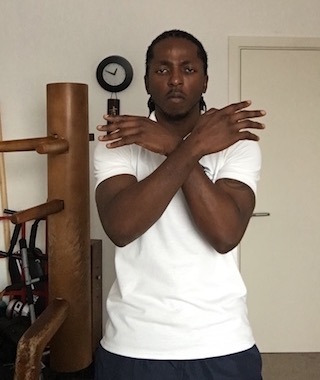
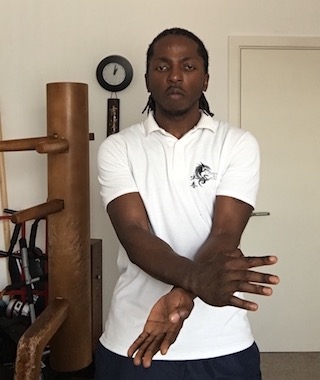
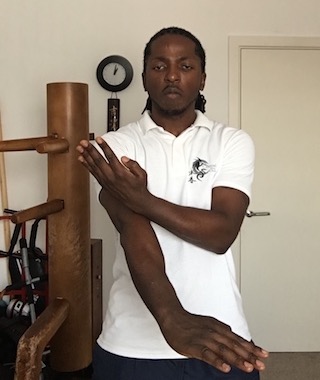
2. Open both hands and extend your arms forward to hip height while rotating both palms so they face down. Throughout the motion, cross your arms with your left arm passing on top. End the outward motion by extending your fingers and hooking your thumbs. Image 2

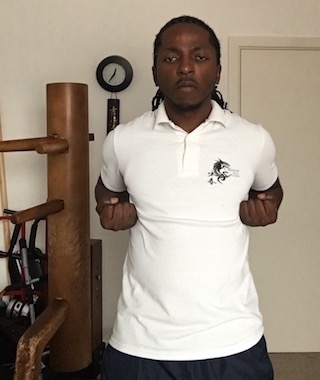
3. Keep both elbows in their current position as you raise and rotate your forearms so both hands are facing you. Image 3

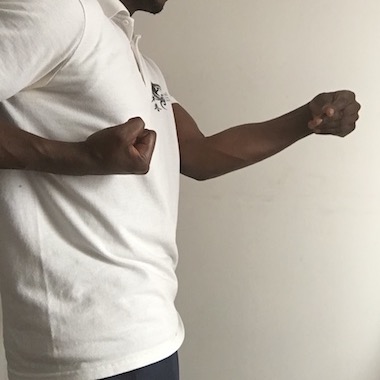
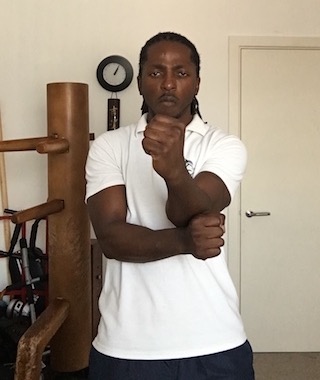
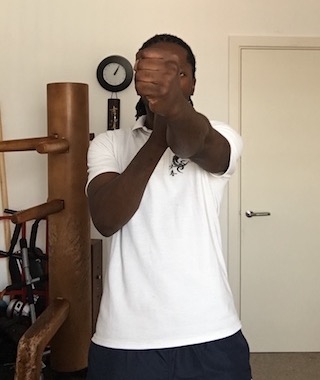
4. Close both fists before pulling both elbows back towards your body stopping when your arms are by your side at chest height, parallel to the floor. Images 4 and 5. Neutral position.
Yat Chi Kuen - Sun character fist
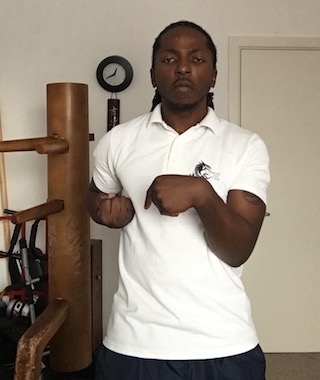
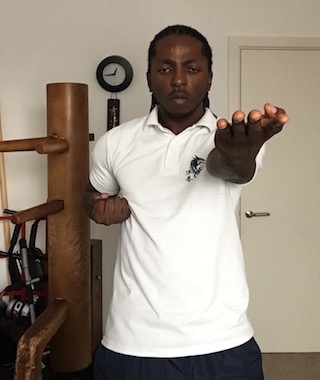
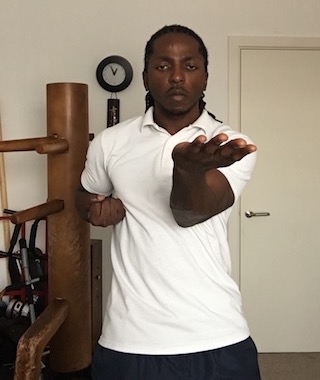
1. Move your left fist to the centre of your body at sternum height. Your knuckles should be in a vertical position. Image 1

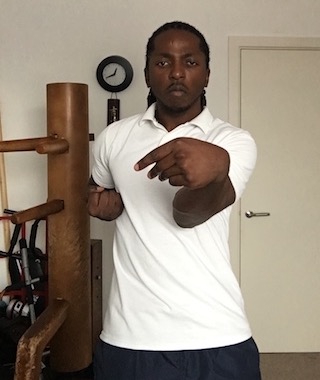
2. Extend your arm forward and up, so your fist travels in a straight path along the centre line ending at nose height. Image 2

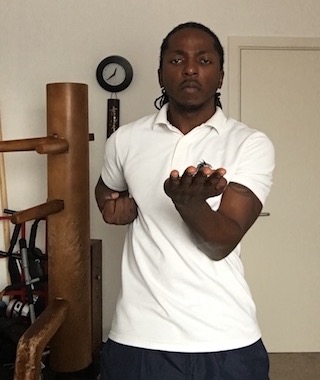
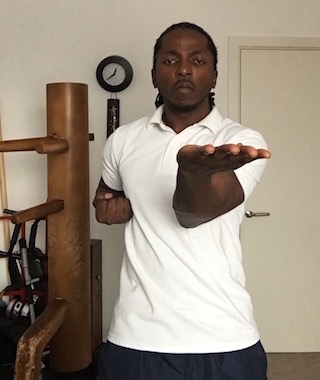
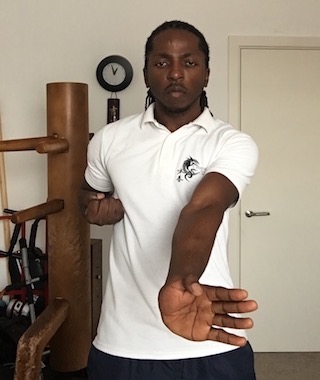
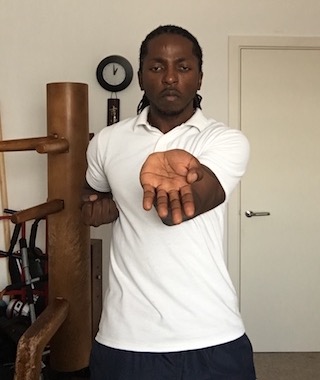
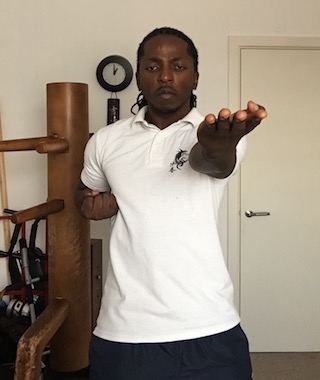
3. Open your left fist (palm is facing up) while slightly moving your arm to the left. At the end of this motion your arm and hand should be in line with your shoulder. Image 3

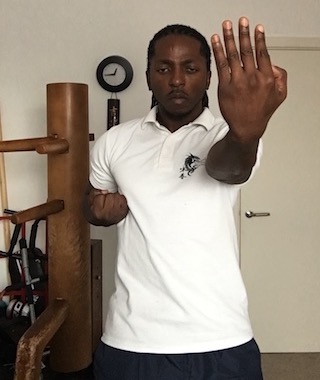
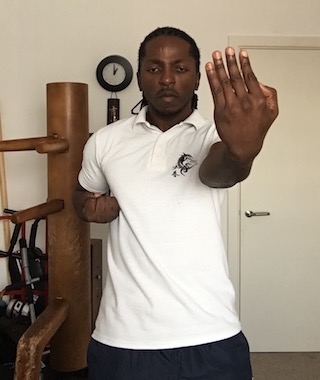
4. While keeping your left arm in its extended position, relax and raise your left hand so your fingers are pointing up. Image 4

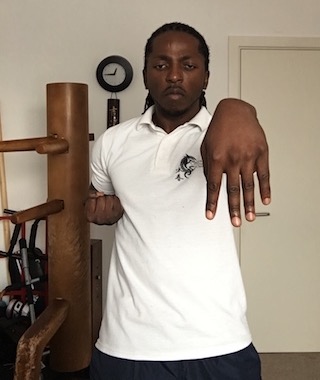
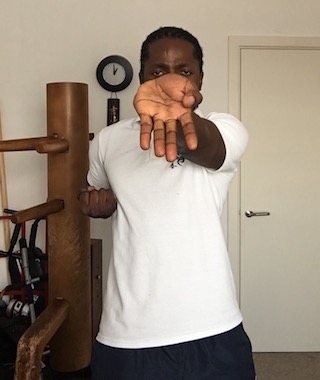
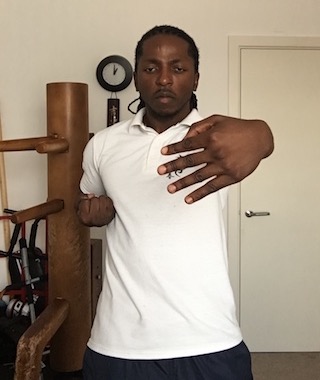
5. Rotate your hand 180 degrees in a clockwise direction until your handfingers are pointing down. Image 5

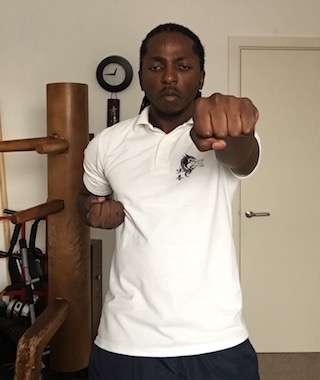
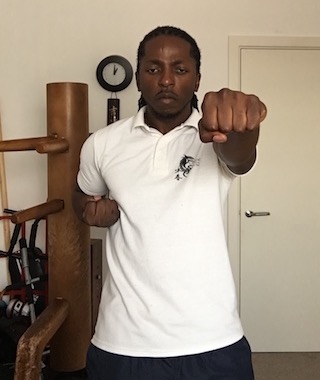
6. Complete the circular (Huen Sau) motion by forming a horizontal fist in line with your left shoulder. Image 6

7. Rotate your arm and pull it back with the tip of your elbow facing down. End this motion with both arms at the side of your body in the neutral position. Images 7 and 8
The three prayers
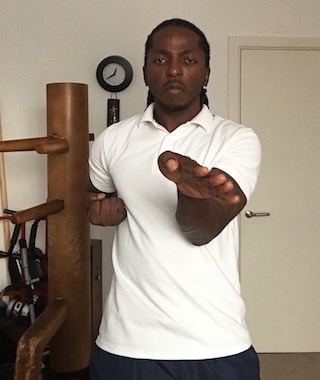
1. Open your left hand extending your fingers out into a flat shape with your thumb hooked. Image 1

2. Gradually move your left arm forward while directing your wrist towards and along the centre line. As your wrist enters the centre line, continue extending your arm and guide your elbow as close to the centre as is comfortable, stopping when your elbow is one fist distance away from your body. Images 2a and 2b.
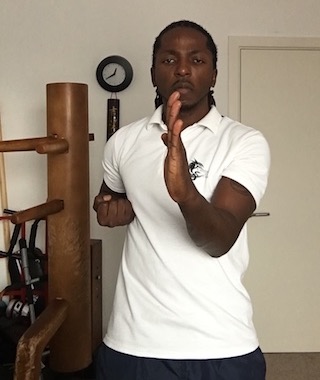
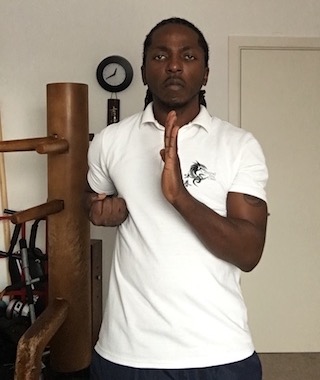
3. Keep your left arm in its current position and relax as you angle your hand up. Image 3. From this position, circle (Huen Sau) your hand in a clockwise direction ending the motion in a half prayer shape (Wu Sau). Image 3b. See end of article for more detail about the Huen Sau.
4. While maintaining the definition Wu Sau, gradually move your elbow back, keeping it close to the side of your body while also keeping your wrist in the centre line. Stop when your wrist has moved back to one 'fist distance' away from your body at sternum height. Image 4
5. Keep your arm and wrist in its position ninth centre. Relax your hand so it slowly collapses allowing your fingers to naturally curl while turning your hand until the knuckle of your index finger and wrist are horizontally level (Fook say).To establish the energy of Fook sau, slightly pull your hand back, creating a mild contraction in your forearm. Image 5
6. Keep your elbow close to your body as you gradually extend Fook sau forward. As your arm extends position your elbow as close to the centre as is comfortable and stop when your elbow is one fist distance in front of your body. Image 6
7. Relax and circle your hand, using your wrist as a pivoting point as you rotate your hand in a clockwise direction. Complete the circling motion (Huen sau) by creating the Wu sau position. Images 7a - 7e
8. While maintaining the centre line with the wrist of your Wu sau, begin moving your elbow back toward the body. Stop when the wrist of the Wu sau hand is one fist distance away from your body. Image 8

9. repeat steps 5 - 8 twice more. when complete you will have extended your Fook sau forward three times and returned to the Wu sau position, one fist distance away from your body.
10. From the Wu sau position, move your left hand at a slight angle stopping when it is in line with your right shoulder. Image 10
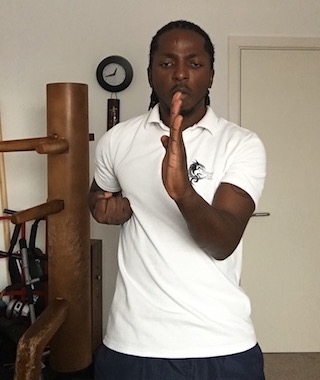
11. return to the centreline while establishing the Wu sau position. From here, deliver a forward palm strike which travels along the centre line toward face height. The completed palm strike (Jeung) will consist of a hooked thumb, slightly spaced fingers and a vertical angle of the hand. Image 11
12. Turn your hand so it is flat with your palm facing up. Image 12
13. Relax and tilt your hand up before circling it in a clockwise direction. stop the rotation when your fingers are pointing down. at this point, close your fist with a forward emphasis. Image 13
14. While pulling your arm back to the side of your body, rotate your arm so the palm of your closed fist in facing up. Complete this motion by assuming the neutral position. Both fists at the side of your body. Image 14
Second section
Each technique in this section should travel to its target area in a relaxed state. the definition and therefore energy of each technique should be applied at the bend of each motion.
1. Open your left hand and rotate it so your palm is facing down. drive your left arm down so it travels along the line of your body toward the ground. complete this motion by establishing a horizontal hand position once again with your fingers slightly spaced and your thumb hooked (Gum sau). Images 1a and 1b
2. Repeat step 1 with your right arm. Image 2
3. Bend at the elbow joints allowing your hands to travel upward following the line with your body. Stop when both hands are just below chest height or as close as your current range of motion permits. Image 3
4. Relax your hands as you simultaneously extend them behind you at a downward angle. compete this motion by tilting your hands so your fingers are pointing toward the back of your knees with your fingers slightly spaced and both thumbs hooked. Image 4
5. Bring both hands back to the previous position ate the side of your body, chest height. image 3
6. Simultaneously extend both hands forward to waist height. Complete this motion by tilting your hands up with the fingers extended spaced and with both thumbs hooked. Image 6

7. Keep your elbows where they are using them as pivot points and bend both arms so they are parallel to each other at chest height with the left arm on top (Laan sau). Image 7

8. Extend both arms to the side of your body beginning by positioning your elbows in line with the shoulders and then extending the wrists to the same line so your wrists, elbows and shoulders are all in alignment. Complete this action by turning your hand inward, hooking your thumbs and extending your fingers (Fak sau). Image 8
9. Return both arms to the horizontal position in front of your body (Laan sau - Image 7 above) but this time place your right arm on top.

10. Bring both elbows together in front of you allowing your left arm to pass under the right, changing the angle of your arms from horizontal to vertical while extending them away from you. End the motion when your fingers are at collar bone height by tilting your hand back, thus extending both wrists slightly forward (Jum Sau). Image 10
11. Rotate both arms so that your palms are facing up while pushing them forward about an inch. At the end of this motion, the heel of your hands should be slightly higher than your fingertips with both thumbs hooked and your fingers extended (tok sau). Image 11

12. Rotate both hands so your palms are facing down while pulling back and sinking your wrists (Jut Sau). Image12

13. Extend both arms forward, directing your outreached fingers to eye level. Both thumbs should be around 1 inch apart. Image 13

14. Keep both arms extended as you lower them straight down and tilt your hands up as far as they go. Stop the motion when your wrists are at waist height (gum sau). Image 14

15. Keep your arms where they are and allow both hands to collapse before placing your thumbs between your index and middle finger. Hold this shape while raising your already extended arms to shoulder height. Image 15

16. Close both hands into a fist with a forward focus, then rotate and pull your elbows back to the neutral position at the side of your body. This completes the second section.
Third section
All of the following techniques will be done with your left hand first and then repeated with your right.
1. Open your left hand and turn your palm so it is vertical as you move and extend across your body in a 45 degree angle. Stop when your hand is in line with the inner part of your right shoulder, where it meets the chest. Keep your elbow angled down throughout this motion. Image 1

2. Keep your elbow where it is, using it as a pivot as you relax your hand and move it to the centre line. At the end of this motion your wrist and knuckle of your index finger should be horizontally level, your fingers should be in a grasping position and angled towards your body. Image 2

3. Turn your hand out while extending your arm forward along the centre line in an inside chopping action. Image 3

4. Straighten your hand up so it is flat and facing forward then angle it up and complete a clockwise circle motion (Huen Sau) ending in a fist position. Image 4
5. Return to the neutral position
6. Repeat steps 1 - 5 with your right hand.
7. Open your left hand and rotate it so it is facing down before corkscrewing your arm forward into the Taan Sau position. Image 7
8. Turn your hand into a vertical position while extending your fingers up and pushing your wrist forward (Jum Sau). Image 8

9. Return to the Taan Sau position.

10. Keep your arm in its current position, relax and angle your hand up. Rotate your hand in a clockwise direction while keeping it pulled back throughout the action. When your fingers reach a downward angle, extend your arm forward toward waist height to form a side palm strike in the centre line. Your fingers should be angled to the right. Image 10
11. Flatten your hand so your palm is facing up, angle your hand up and circle (Huen Sau) in a clockwise direction ending with a horizontal fist. Image 11
12. Return your arm to the neutral position at the side of your body.
13. Repeat steps 7 - 12 with your right arm.
14. Open your left hand, relax and turn your palm down before corkscrewing your palm into the Taan Sau position. As you extend your arm keep your elbow close to your body. Taan Sau.
15. Rotate your arms to ash your palm is facing down while lowering your hand down through the centre line to hip height. Nearing the end of the downward motion move your wrist out to the left so your hand is angled inward with only your fingers in the centre line (Gaan Sau). Image 15

16. Return to the tan sau position. Image 16

17. Huen Sau in a clockwise direction until your fingers are pointing down then extend your arm forward to hip height with a side palm strike. Image 17
18. Turn your hand so it is flat with your palm facing up then Huen Sau in a clockwise direction ending with a closed fist.
19. Retract your arm to the neutral position at the side of your body.
20. Repeat steps 13 - 18 with your right hand.
21. Open your left hand then direct your wrist through the centre line while rotating your arm and raising your elbow. At the end of this motion your hand should be relaxed at sternum height. Your elbow should be shoulder height, and also in line with your elbow from a front facing perspective. Image 21

22. Keep your wrist where it is using it as a pivot while you lower your elbow to form a Taan Sau in front of you.

23. Extend your arm forward while lowering your fingers, striking with the heel of your palm. Image 23
24. Flatten your hand, Huen Sau and return your arm to the side of your body.
Return to the neutral position
25. Repeat steps 20 - 24 with your right hand.
26. Extend your left hand forward towards waist height through the centreline while rotating your arm so your palm is facing down. At the end of the motion angle your hand inward while you extend your fingers and hook your thumb (Gaan Sau). Image 26
27. Slide your right arm across your body at chest height so your wrist is positioned above your left elbow with your right palm facing you. Image 27

28. Rotate your extended left arm and pull it directly back toward you while sliding your right arm forward and turning the right palm down. Complete this transition by forming a Gaan Sau with your right arm. Your left wrist will be positioned above your right elbow meaning that the hand positions have swapped. Images 28, 28b, 28c
29. Repeat this motion twice more exchanging the Gaan Sau and rear arm each time.
30. On the final exchange, make a fist with your left hand. Image 30

31. Punch forward with your left hand while raising your right hand so your column of knuckles are directly above your left elbow. Image 31
32. Direct a further 5 punches through the centre line. As the final punch goes out, form a fist in place of the open hand near the extended elbow. Image 32
33. Open your right hand so the palm is facing up. Huen Sau and retract your arm into the neutral position.

34. Straighten up your feet so they are both facing forward and parallel with each other. Bring your right foot into the left so they are both in contact.
35. Raise your stance while pushing down with both hands. When your pushing your hands down they should be at a horizontal angle parallel to the floor.
This completes the First Form.


